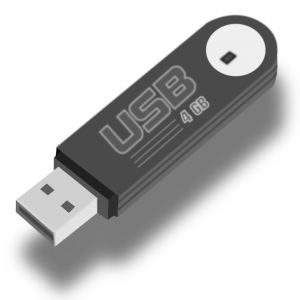
AutoRun can be enabled or disabled for all Removable media types, such as a Floppy or Zip disk, and USB Flash Drives. This is useful to know because removable media can easily be infected with viruses and spyware that is configured to install when removable media is inserted into the PC. Windows systems are configured to enable CD Notification, other removable media are by default disabled, but if for some reason they aren’t, then it is a good idea to disable them.
The System Properties User Interface only exposes the CD Enable or Disable option. The setting reflected in this dialog makes an entry in the System Registry. It is in this same location that other media types are configured.
Notes:
1. Modifying the Registry is not for the inexperienced user. Anyone will tell you to, be VERY careful.
2. The modifications shown below use Hexadecimal not Decimal numbers. If you are unfamiliar with the Registry or Hexadecimal, looking into these topics prior to making these modifications is advisable.
To Modify the following Registry Settings, Use “Regedit” and navigate to the following Key:
HKEY_CURRENT_USER
Software
Microsoft
Windows
CurrentVersion
Policies
Explorer
“NoDriveTypeAutoRun”
The default value for the setting is 95 0 0 0. Change the first byte to 91. Restart the computer to make the new setting take effect. You may have to right-click on the floppy and choose AutoPlay from the menu to see the AutoPlay behavior.
https://spottydog.com.au/wp-content/uploads/2011/06/flashdrive-300x3001-1.png300300Adminhttps://spottydog.com.au/wp-content/uploads/2022/08/Logo-Spotty-Dog-Computer-Services.pngAdmin2011-06-16 08:15:002022-07-28 06:55:52How To Enable or Disable “AutoRun” for removable media
Backing up your data is a bit like going to the Dentist or Doctor for a checkup, or checking the air pressure in your car tires.
It should be done regularly, but because of forgetfulness, the unpleasantness, or just plain laziness, you put it off and before you know it, the hard drive fails and all your files, emails, music, and photos are gone for good.
Given that the consequences are so dire, why don’t we all back up more often?
Most people don’t back up their hard drives. The reason? Most people don’t know how. I am constantly being asked, “how do I do a backup?”
So what are the best ways to back up your data cheaply and easily.
The most common means of backing up data is to use a second hard drive connected to your computer, either internally or externally. Hard drives can deliver huge data storage capacities, from less than 100GB to more than a terabyte (TB), and at a very low cost per-gigabyte. When buying a second drive, it is a good idea to opt for one that is at least twice the capacity of your current hard drive, as this will give you room to grow.
A second hard drive has the capacity to allow you to create a “mirror image” of your primary hard drive, making an exact copy of the entire drive. That way, if your primary hard drive fails, you can easily restore your computer with all your current data, software and updates.
You can add an additional internal hard drive, which involves opening your computer and installing it. With an internal hard drive, you can also set it up it in a RAID configuration that maintains an automatically mirrored copy of your primary hard drive in Real Time. Note that RAID wasn’t designed with the average consumer in mind, so setting it up is not particularly intuitive, and can’t be setup after the fact. It needs to be done at the time of OS installation. If RAID isn’t an option because you don’t want to reinstall the OS, I suggest the use of a fantastic little program called Mirror Folder. It simulates RAID without the need for a RAID capable motherboard, drivers and reinstall of the OS.
If all that sounds to hard, then using an external hard drive connected via USB, FireWire or if available external Serial ATA (eSATA) interface may be easier. eSATA supports fast transfer speeds equal to those of internal SATA hard drives.
Another reason external hard drives may be a better option is that they are portable. That means you can transport your backup files by simply unplugging your external hard drive and taking it to another location.
To get the most from an external hard drive, you’ll also need to use backup software. Many external hard drives are supplied with a backup solution that allows you to schedule automatic backups, and Windows XP, Vista, and 7, have simple backup software built right into the OS. If neither of these options float your boat, you can download free backup software, or buy a commercial one. My favourite backup solution is SyncBack (free and paid for versions) and even the aforementioned Mirror Folder.
Whatever you use, look for software that lets you schedule your backups. If your data is sensitive, then data encryption is another feature to look for.
Backing up to CDs or DVDs is another option, but mainly for those who want to safeguard just particular files and folders, and not the entire hard drive. That’s because optical discs have much smaller capacities. A CD can store only 650MB, a DVD stores 4.7GB, and a double-layer DVD stores 8.5GB.
The benefit to backing up to optical discs is that every PC these days has a disc burner. The discs themselves are readable by just about any PC, they are very inexpensive when bought by the spindle, and if properly stored and of sufficient quality, an optical disc should last at least 50 years. The big downside though, apart from the limited capacity, is that you can’t schedule optical burners to automatically back up your files, and like an external hard drive, you’ll still need software to make the backup process as painless as possible.
Thanks to always-on broadband, backing up your data to an online storage is now a viable option. Online storage often enables you to access your data from any PC that connects to the Internet. Online storage services also offer automated or scheduled backup for “set and forget” ease of use, and unlike backing up to another drive or optical discs, your files are stored on a remote server and not in your home. This means that you don’t have to worry about theft, fire or natural disasters, your data is safe and will still exist in cyberspace.
But there are limitations due to issues with bandwidth and maximum upload speeds as determined by your Internet service provider and plan. Backing up files online will take longer than copying files to a second hard drive, and depending on the speed of your service and the data allowance you have, this method could end up costing a lot more than purchasing an external hard drive or using optical discs, especially since some ISP’s, count uploads towards your monthly quota. Online services can’t create a full-drive mirror image, like you can with an external drive, so they’re best for backing up files such as digital photos, music, and other documents.
Carbonite is my choice for online storage services. It will back up your files behind the scenes. After you install the program onto your Windows PC, Carbonite can back up all the data on your hard drive or you can specify which folders, subfolders, and files you want to store. As long as your computer is on and connected to the internet, Carbonite will continuously monitor and back up your data. Whenever you create a new file or modify an existing one, Carbonite records the changes. The only files it won’t back up automatically are Windows system files, although you can force Carbonite to save them but it is advisable not to because they could cause problems when restored.
To indicate which files have been backed up, Carbonite adds coloured icons on the file or folder icons in Windows. A green dot indicates that the item has been backed up, while a yellow one means that a backup is in progress. Your files are encrypted and stored securely on remote servers. When you need to restore your files, just launch the program, and Carbonite guides you through the process, or if you are restoring files onto a new machine, just download the application, and Carbonite will take care of the process. Carbonite offers a free 15 day trial, and the service costs US$49.95 per year or US$89.95 for two years, with unlimited storage.
USB flash drives are perhaps the most familiar and newest players on the ad-hoc backup circuit. Although a small-capacity 128MB drive won’t have the capacity to backup anything substantial, newer flash drives with higher capacities of between 2GB and 32GB provide significant storage space.
USB flash drives are extremely portable which makes them great for backing up files to take with you. You can use the same software for backing up to other media, but you can also use the backup tools built into Windows or Mac OS X.
Due to their small size, however, these drives are easy to lose. If you’re going to back up sensitive materials to one, make sure it offers data encryption.
Finally, whichever medium or device you choose to backup to, remember they can all fail and fail badly. So it is always wise to have multiple backups in multiple locations.
https://spottydog.com.au/wp-content/uploads/2011/05/database-backup1.jpeg260260Adminhttps://spottydog.com.au/wp-content/uploads/2022/08/Logo-Spotty-Dog-Computer-Services.pngAdmin2011-05-20 14:36:552022-07-28 06:55:53Back It Up or You Will Lose It
You can use your own Domain Name. – You can link your own Domain Name to Google Apps, and use Gmail for your Domain Name email. Why would you want to do this? Well for one thing, it is easy to sync Gmail with smartphones like the iPhone or HTC’s range. Secondly, unlike most hosting providers, Gmail allows you to setup your email to use IMAP as well as POP. So what, I hear you say. Well if you don’t know what IMAP is, it allows you to sync every aspect of your email with every device using that email address. For example, if you receive an email on your PC, the same email will be received on your smartphone, and laptop and so on. If you send an email from your smartphone, it will sync to the sent folder on your PC and laptop and so on.
Use it with other Google services. – Of course all that sounds great, letting Google take care of your e-mail system, but Google Apps also provides other services such as Google Docs which is a web based Office Suite that does not require a local installation on your hard drive. To coin a phrase, it’s in “The Cloud”. Other Google Apps are Google Sites, Google Calendar, etc. Google Calendar will also sync instantly with your smartphone when connected to the Internet. All of these apps run in your browser and that means that the application is not installed on your hard drive and you don’t need to manage updates etc.
Collaborate (without software installation). – Another plus when using “Google Apps for your domain” is the great collaboration features. For instance, you can create a document in Google Docs that someone else in your organisation could edit at any time. This might not sound like a big deal since you could manually send the document to those that you are collaborating with, but Google Apps takes care of that automatically, and you can create and share multiple Calendars with multiple people, and designate who has access to which Calendar.
It is free. – Google Apps does not cost a cent. You still have the normal operating costs involved with owning a Domain Name and Website Hosting, but Google themselves do not charge anything at all for this valuable service, unless you need to have more than 10 users, then you will need to use Google Apps for Business. Google Apps for Business also has extra features like Google Video for Business and Google Groups for Business as well as 25GB email storage per user, BlackBerry and Microsoft Outlook interoperability and a 99.9% up-time guarantee with 24/7 support. The cost for this is $5 per user per month.
It is secure. – Google Apps is secure and delivers things like a spam-filter and anti-phishing in Gmail, but what I really like is the fact that Google’s Servers take care of my email, and I can use my own Domain for my email. Google’s Servers are fast and are almost never down, and because I can use my own Domain Name for my email addresses, I know that if Google ever cancels my account then I can just simply use my hosting providers e-mail service without changing my e-mail address. If my email address was name@gmail.com and for some reason Google banned the account, I would lose the email address forever.
https://spottydog.com.au/wp-content/uploads/2011/05/google_apps_logo1.jpeg16001488Adminhttps://spottydog.com.au/wp-content/uploads/2022/08/Logo-Spotty-Dog-Computer-Services.pngAdmin2011-05-19 18:14:132022-07-28 06:55:54Why you should consider using Google Apps
I recently had an HP DV6-2111tcx Laptop come into the workshop that had faulty hard drive and needed to be replaced.
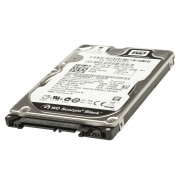
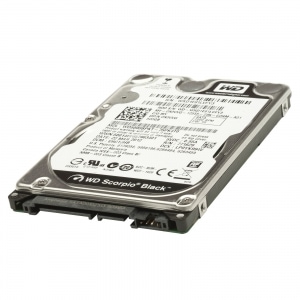
I ordered a replacement Western Digital hard drive with 640GB capacity instead of the 500GB capacity of the original.
Once the system was restored to factory default using the HP Restore Disks, I proceeded to install all the Windows Updates. Well I tried to at least. What I found was that Windows Update produced an error stating that the Windows Update cannot currently check for updates, because the service is not running, and a suggestion that I restart the laptop. The service was running and restarting the laptop was of no benefit.
So I tried an experiment. I did a clean install of Windows 7 using an OEM disk and then proceeded to download and install all the latest drivers from HP. I thought to myself, “well that should resolve the problem”, but wouldn’t you know it, the same problem was occurring.
So I did another clean install, and this time I didn’t install the HP drivers. And guess what? This time Windows Update worked just fine. The conclusion? Well obviously there was an issue with one of the HP drivers. So rather than uninstall the drivers and re-install them one by one, I thought it would be quicker to simply telephone HP and ask them if they knew of any problems with any of their drivers. After all, it is their product and software, so they should be in a position to tell me.
Well after an hour waiting on hold I was eventually tended to, only to be told there was nothing they could do and that they could assure me that if I downloaded the latest drivers from the HP website, there should be no problem. They held this line even though I explained that a clean install solved the problem and it was only after installing their drivers that a problem occurred.
Hmmmmmm. Now what will I do? So after thinking about it for a bit and on the off chance they may be able to assist, I decided to call Microsoft. The service rep at the end of the line suggested I look at the Windows Update log and in there was an error code. I can’t recall the code now, but when I quoted it to him he said he seemed to recall something about this error code and to please hold the line while he looked into it.
Shortly thereafter he got back on the line and requested my email address so he could send me a link to an updated driver for the Intel Rapid Storage driver. And guess where this link was? Yep, Hewlett Packard.
So why couldn’t Hewlett Packard give me this information? Well your guess is as good as mine.
The upshot was that I downloaded the updated driver and Windows Update worked fine. It seems that HP Laptops with a Western Digital high density hard drive, such as 1TB or 750GB or even 640GB may display abnormal error messages if the Intel Rapid Storage Technology Driver (IRRT) is not updated. Examples of error messages include:
Windows requires a digitally signed driver. This message appears after inserting a media card into the 4 in 1 card reader for the first time.
Windows Live Mail could not be started. This message appears after launching Windows Live Mail.
Windows requires a digitally signed driver. This error message appears while installing 3G USB dongle.
An error message appear while running benchmark software such as PCMark Vantage or MobileMark 2007.
Windows Update cannot currently check for updates, because the service is not running… This error message appears while performing a Windows Update.
https://spottydog.com.au/wp-content/uploads/2011/05/WD5000BPKT_4_1600x16001.jpg16001600Adminhttps://spottydog.com.au/wp-content/uploads/2022/08/Logo-Spotty-Dog-Computer-Services.pngAdmin2011-05-04 14:30:012022-07-28 06:55:55HP Laptops and High Capacity WD Hard Drives
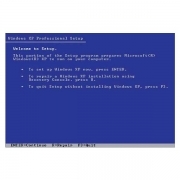
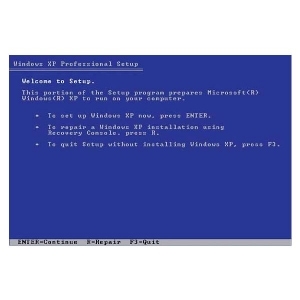
The Recovery Console provides system repair and recovery functionality.
Type EXIT to quit the Recovery Console and restart the computer.
1: C:WINDOWS
Which Windows Installation would you like to log onto (To cancel, press ENTER)?
Go ahead and hit the number 1 on your keyboard, or whichever number corresponds to the operating system you were using when havoc struck. Enter your administrator password, and then hit enter. You’re in! Now it’s time to run with the big dogs! Do not be afraid, dear reader; I am here to help you.
If you type the following commands into your computer, it will work magic, akin to going back in time. There are three parts to this process, but believe me, they take much less time than reinstalling Windows XP and all your applications. So follow along with me, and keep in mind that each command must be typed exactly as you see it here. Please note that this procedure assumes that Windows XP is installed to the C:Windows folder. Make sure to change C:Windows to the appropriate windows folder if it’s at a different location. The copy commands will answer you with a little “file copied” message. The delete commands just move on to the next line. Because of the way your Web browser displays individual lines, a command might look to you like its two lines, so I’ve separated each command by an empty line. But anyway, type the whole command in one line, and when you’ve finished typing that command, hit the Enter key. Be sure to include the spaces I’ve included between each word here:
Section Addendum Note: In the following commands, we are simply copying some existing files to a temporary location. This way, if anything should go wrong down the line, you will at least still have access to the original files. These original files are not used again in this tutorial, but you should be aware that you made a backup copy of them in the following directory:
c:windowstmp
md c:windowstmp
cd c:windowssystem32config
copy system c:windowstmpsystem.bak
copy software c:windowstmpsoftware.bak
copy sam c:windowstmpsam.bak
copy security c:windowstmpsecurity.bak
copy default c:windowstmpdefault.bak
del system
del software
del sam
del security
del default
Important Addendum Note: When attempting the copy operations above, you may encounter an error message saying basically “unable to copy”. The way around this is to simply replace the copy (and delete) commands above with the following:
cd windowssystem32config
ren system system.kpp
ren software software.kpp
ren sam sam.kpp
ren security security.kpp
ren default default.kpp
I use the extension .kpp because windows XP sometimes likes to use the .bak extension itself and unlike the copy commands above, we are not putting our backup copies in the windows tmp directory, but rather we are leaving them in their original directory (but with the .kpp extension, so that windows will ignore them.). As I said before, these are just backup files, but it is good to know where they are if the repair fails and you ever need them. Note: The delete is no longer necessary because rename is basically like a “copy and delete” operation in one.
Section Addendum Note: In the following commands, we are simply copying some repair (basically default window install) files so that we can get windows XP to boot. (It will look awful and none of previous setup and programs will show up, but that is fine.) We simply need to make windows run able so that we can do the next parts (that will restore our full configuration as it was prior to the crash).
cd c:windowsrepair
copy system c:windowssystem32configsystem
copy software c:windowssystem32configsoftware
copy sam c:windowssystem32configsam
copy security c:windowssystem32configsecurity
copy default c:windowssystem32configdefault
Now you can relax for a minute. You’ve made it through the first part! Way to go! Now what did you just do? I’ll tell you. You first made a temporary directory called “tmp” (md tmp), and then into it, you copied all the files that boot up Windows. Then you deleted all those startup files, one of which is the stinker that got you into this mess in the first place. After that, you copied into that same place fresh startup files from a special repair directory. When you reboot, Windows will look for those files where it always does, and there won’t be a stinker in the bunch. The only thing is, there won’t be all your settings for all those applications you run every day, either. But not to worry, right now you’re sitting in something like a lifeboat — it’s not the original ship, but it’ll get you back to where you need to go. We’ll get everything back to that comfortable place, but only after we go through steps 2 and 3.
Now type Exit and watch your computer restart into Windows XP again. Be sure not to tell it to boot from the CD this time. But wait. That’s not the way you had XP set up before this disaster struck! That’s OK. We’re in a lifeboat right now — this isn’t your comfy cruise ship, not just yet. Hang in there. I’m going to show you how to restore your system to the way it was the moment before you told it to install that errant application, or whatever it was you did, so follow along and we’ll go to part 2.
Part 2
Here’s where you’ll copy the saved registry files from their backed up location by using System Restore. This folder is not available in Recovery Console and is normally not visible — Microsoft is protecting you from yourself by hiding it from you and locking it away from you. But we have the keys. Before you start this procedure, you’ll need to change several settings to make that folder visible:
1. Start Windows Explorer.
2. On the Tools menu, click Folder options.
3. Click the View tab.
4. Under Hidden files and folders, click to select Show hidden files and folders, and then click to clear the “Hide protected operating system files (Recommended)” check box.
5. Click Yes when the dialog box is displayed that confirms that you want to display these files.
6. Double-click the drive where you installed Windows XP to get a list of the folders. It’s important to click the correct drive.
7. Open the System Volume Information folder. This folder appears dimmed because it is set as a super-hidden folder. If you’re using the FAT32 file system, this will be easy. If you’re using NTFS, it won’t let you open the folder, but here’s how to get around that: Right-click on that system volume information folder and select Sharing and Security. Then click the Security tab. (No security tab? Skip two paragraphs.) Click Add, and then in the box that’s labelled “Enter the object names to select,” type the name of the user that’s at the top of the Start menu — that’s probably you. [Damn it, why do they say object names when it’s people’s names? I guess that’s Microsoft for you.]
Anyway, make sure you type the name the way it’s listed there on the Start Menu. I made the mistake of typing my first name only and it wouldn’t let me in. Type first and last name if that’s how it’s written on the top of the Start menu. After you’ve typed that in, click OK a couple of times and finally that monster will let you in.
But what if you don’t see a Security tab? Try this: Click to select the checkboxes (Addendum Note: check BOTH checkboxes) in the “Network sharing and security” area — one is labeled “Share this folder on the network” and the other is labelled “Allow network users to change my files.” Change the share name to something short, like sysinfo. Then it’ll let you in. After you’re done with this entire rescue operation, you might want to go back and change these back to the way they were before, for maximum security. (Addendum Note: If you get an error when you change the name to sysinfo, and hit apply/ok, just try it again…that happened to me, but it worked on the second try with no problems.)
OK. Now here you are, in the inner sanctum where only the high priests go. Be not afraid, all ye who enter here. As Microsoft so eloquently puts it:
NOTE: This folder contains one or more _restore {GUID} folders such as “_restore{87BD3667-3246-476B-923F-F86E30B3E7F8}”.
8. Open a folder that was not created at the current time. You may have to click Details on the View menu to see when these folders were created. There may be one or more folders starting with “RP x under this folder. These are restore points.
Addendum Note: The System Volume is NOT a subdirectory the windows directory. So if you cannot find it, go up one directory level and look again.
9. Open one of these folders to locate a Snapshot subfolder; the following path is an example of a folder path to the Snapshot folder:
From the Snapshot folder, copy the following files to the C:WindowsTmp folder (you can use your mouse, you’re in Windows now, remember?):
_registry_user_.default (Addendum Note: Notice the period (“.”) before the word default)
_registry_machine_security
_registry_machine_software
_registry_machine_system
_registry_machine_sam
This is how Microsoft explains this: “These files are the backed up registry files from System Restore. Because you used the registry file created by Setup, this registry does not know that these restore points exist and are available. A new folder is created with a new GUID under System Volume Information and a restore point is created that includes a copy of the registry files that were copied during part one. This is why it is important not to use the most current folder, especially if the time stamp on the folder is the same as the current time.”
Anyway, you’re still not done. Don’t worry, the magic is about to begin. Believe me, if you do this in front of your friends, they’ll start thinking you’re some kind of god. So, heavenly father, get ready to dazzle ’em.
Now it’s time to place those files you just made visible to the Recovery Console where they belong. And to do that, we need to get back into the Recovery Console. So, make sure your CD is in the drive, and restart Windows, this time hitting any key when it tells you to do that if you want to boot from CD. Yes, you want to boot from CD, so you can launch your old cryptic pal, the Recovery Console. Type R after it goes through that file-reading routine that looks like an install but isn’t. Then you’re back into our dark-suited friend with its ominous command line. It’s kinda like going into the basement to fix some broken pipe or something. But we’re not scared. The command line is our flashlight and friend. Here we go:
Part 3
In part three, you delete the existing registry files, and then copy the System Restore Registry files to the C:WindowsSystem32Config folder:
From within Recovery Console, type the following commands:
Section Addendum Note: Here we are simply replacing those “default” repair files with valid and current restore point files. So we delete the old files (default) files and copy in the new files. If get errors when trying to delete, you can simply skip the delete commands and just do the copy (and when prompted to overwrite, type Y (for yes) and hit enter
(Notice the period (“.”) before the word default in the first parameter)
Now you’re done! Type exit and your computer will reboot into whichever restore file you chose. But wait. If it’s not the right one, that’s OK, you can now go into your System Restore area and pick a different restore point if you want. There’s a whole calendar full of them in there. I bet you didn’t know that Windows XP is watching just about every move you make, taking notes all the while. It can restore about any state you had on that machine. And the best part is, even when it’s doing all that, it’s still 10% faster than Windows 2000 according to our extensive tests here at the Midwest Test Facility. Here’s how to get into that restore area if you’re not happy with the current restore point:
1. Click Start, then click All Programs.
2. Click Accessories, and then click System Tools.
3. Click System Restore, and then click Restore to a previous Restore Point.
https://spottydog.com.au/wp-content/uploads/2011/01/8EDD557233FC0883DFBCADFAC4798681920C65BD_large1.jpg600600Adminhttps://spottydog.com.au/wp-content/uploads/2022/08/Logo-Spotty-Dog-Computer-Services.pngAdmin2011-01-06 16:51:412022-07-28 06:55:56How to fix XP if the 2nd “R” Repair Option is unavailable
Over the years I have used many programs. During that time, they have served me well so I thought I would share them with you.
In no particular order, here they are:
Avast Free Antivirus – A free antivirus and antispyware security software program for Windows 7, Vista and Windows XP. Download it here.
SyncBack – A freeware program that helps you easily backup and synchronize your files to, the same drive, a different drive or medium (CDRW, Compact Flash, etc), an FTP server, a Network, or a Zip archive. Download it here.
Malwarebytes – A free tool that can identify and remove malicious software from your computer. Download it here.
GIMP – Image and photo editing software. Similar to Photoshop but free! Download it here.
Open-Shell – Software that changes the Start Button on Windows 8, Windows 8.1, Windows 10, and Windows 11 to make it act like the traditional Windows 7 Start Button. Download it here.
FileZilla – A fast and reliable cross-platform FTP, FTPS and SFTP client with lots of useful features and an intuitive graphical user interface. Download it here.
Libre Office – An open-source office software suite for word processing, spreadsheets, presentations, graphics, databases. Download it here.
Audacity – A free, easy-to-use audio editor and recorder. Download it here.
Lightshot – The fastest way to take a customizable screenshot. This app allows you to select any area on your desktop and take its screenshot with 2 button-clicks. Download it here.
Melbourne, 28 May 2010 – AVG (AU/NZ) Pty Ltd warns that Apple Macs running the OS X operating system, or some flavour of Linux distribution, are not immune to viruses, malware and other forms of Internet-carried spambots, Trojans, hacking and phishing.
That’s right, Apple Macs running the OS X operating system, or some flavour of Linux distribution, are open to attack from cyber criminals.
Now of course hackers and spammers are not stupid and they know that Windows users represent the ‘low hanging fruit’ in terms of potential targets. The sheer weight of numbers that the Windows’ user base carries with it makes it the primary target for malware attacks – and it’s going to stay that way for the foreseeable future.
“But,” Lloyd Borrett, Marketing Manager, AVG (AU/NZ), says: “The web changes everything. More specifically, web services, social media and online applications change everything.
“Suddenly you are operating one step further away from your Mac’s desktop and you are at the mercy of live real-time contact from third parties and the World Wide Web in general. This levels the playing field in some senses, so that suddenly your Mac is not a Mac for a moment – instead it’s just a computer.”
With the growing popularity of web services from Twitter and Facebook and so on, the opportunity to spread malware hidden in a simple link has, arguably, never been greater.
So Mac’s do have vulnerabilities and people should be increasingly aware of browser security concerns. Without identifying specific security holes in Safari or Opera (or Firefox for that matter), the operating system is no longer the primary target for Internet-driven user attacks by cyber criminals. The target is the application itself and the user’s behaviour within it.
Apple’s popularity is growing all the time even if its market share is still somewhere around less than 10 percent globally. Just this year security researchers found eight fresh zero-day vulnerabilities in Apple’s Safari browser.
“What matters most is that viral attacks are constantly evolving and looking for fresh blood,” Borrett continued. “So, everyone needs to think about Internet security protection. It’s as simple as that.”
Technical Facts
Looking objectively at the Mac operating system and tools, there is arguably a larger total surface area of code open to potential attack.
Combining rich use of Flash and Java with support for multiple file formats does not exactly put up extra barriers. Digging deeper, Address Space Layout Randomisation (ASLR) has been around since Windows Vista as an anti-exploitation technology, yet it is only present in Mac OS X 10.5 in some library offsets and therefore does not offer complete protection in the way that the technology was designed.
Conclusion: Apple Mac, Windows or Linux, the fact is that regardless of the operating system each of us is using, we’re all in this together. Everyone needs to be aware of what they are clicking on and use their commonsense – if something doesn’t look quite right, it probably isn’t!
.
https://spottydog.com.au/wp-content/uploads/2010/05/virus-detected-300x2681-1.jpg268300Adminhttps://spottydog.com.au/wp-content/uploads/2022/08/Logo-Spotty-Dog-Computer-Services.pngAdmin2010-05-16 08:18:222022-07-28 06:55:58Great Security Myth: I Don’t Need Anti-Virus Protection because I Bought an Apple Mac!
Malware/Scareware Threatens to Sue BitTorrent Downloaders.
A new malware scam is trying to trick BitTorrent users into paying for illegally downloading copyrighted material.
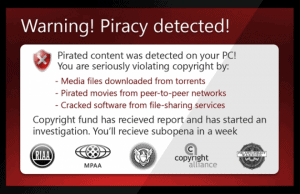
The malware displays a box with the message “Warning! Piracy detected!” and opens up a web page supposedly run by a Swiss company which states thet are “committed to promoting the cultural and economic benefits of copyright.”
The fake company, the ICCP Foundation, claims to be sponsored by the Recording Industry Association of America, the Motion Picture Association of America and others. TorrentFreak, which was the first to discover the malware, wrote that, “It appears to scan the user’s hard drive for .torrent files and displays these as ’evidence’ of an earlier infringement”.
Victims are warned of possible imprisonment and fines, and given the option of “settling” the “case” for a one-time payment of $400, by credit card.
Obviously you would be crazy to hand over your Credit Card details, but it only takes a small percentage of victims to fall for the scam to make some serious cash, which is why the scammers go to the trouble.
https://spottydog.com.au/wp-content/uploads/2010/04/bittirrent_scam1.png427660Adminhttps://spottydog.com.au/wp-content/uploads/2022/08/Logo-Spotty-Dog-Computer-Services.pngAdmin2010-04-16 07:46:352022-07-28 06:55:59Scareware Part 2
Someone has coined this new term to describe fake antivirus and antispyware software. Makers of fake antivirus and antispyware software are exploiting search engines and driving people to sites selling fake security products.
By slightly mis-spelling the name of popular security products, they trick you into visiting their malicious site, and bombard you with messages and pop-ups about how badly you are infected and how many viruses you have and “scaring” you into buying their product. This is fooling tens of thousands of people into purchasing this fake software, which in fact infects them further. I have seen figures that show these cyber-criminals may be making upwards of $10,000 per day.
Popular mis-spellings are Ad-Ware instead of Ad-Aware, Spywarebot instead of Spybot, and Spyware Blaster instead of SpywareBlaster.
There are a multitude of fake products out there. A couple that spring to mind, in addition to those above, are WinXP Antivirus, Antivirus 2009, but there are 1000’s more.
The golden rule is DO NOT just search the internet for a security product. Contact a reputable company for advice, or better yet, just read this Blog!!!!!
https://spottydog.com.au/wp-content/uploads/2010/04/bittirrent_scam1.png427660Adminhttps://spottydog.com.au/wp-content/uploads/2022/08/Logo-Spotty-Dog-Computer-Services.pngAdmin2010-03-16 07:49:202022-07-28 06:56:00Scareware Part 1